Finding Our Location
A couple of weeks ago on a wednesday afternoon a model and I got in contact with the hopes of speedily throwing together a shoot that we could do that very Friday. Normally there’s a bit more of a buffer between first contact and actual shoot, but she wanted to get some photoshoots in before she started back to work the next week. Due to covid, I hadn’t done a shoot in quite a while and felt really excited to get to creating again since things had lightened up a little bit at that time. (Note: We both planned to follow all precautions in place due to combating the pandemic.)
So, we got to brainstorming and decided on a “greenhouse” or something of the rather. I got to doing research on locations in the Salt Lake Valley, and ended up with a small amount of different choices in the end. Once I found the few places that interested me, I got to calling/ trying to contact those locations to see what would be required to do a photo shoot there (any photo fees, scheduling, rules, etc.) The issue here was that I needed to know the answers to these questions within a 24 hour period in order to keep the shoot on that Friday as planned. This proved to be a challenge with a couple locations, “ Leave a message at the tone” and “Usually responds within 48 hours” wasn’t gonna cut it for me.
After getting a little discouraged when not being able to get a hold of places I thought of one last place. A place I have been many times that wasn’t necessarily what I had in mind but could just possibly do the trick; Western Garden Centers in West Valley CIty. (See map below.) I love shopping at this cute garden center and figured we could probably get some really nice images out of the outdoor space.
I call them up and get transferred to the manager who so graciously gives me and my model permission to do our photoshoot there. I made sure to ask that the day and time of the shoot was okay with the store manager and she gave me the go ahead. YAY! I then relay the message to the model, send her a model release form to sign, and we’re all booked up for that Friday at 10am.
Day Of Shoot
Beginning Our Photo Session:
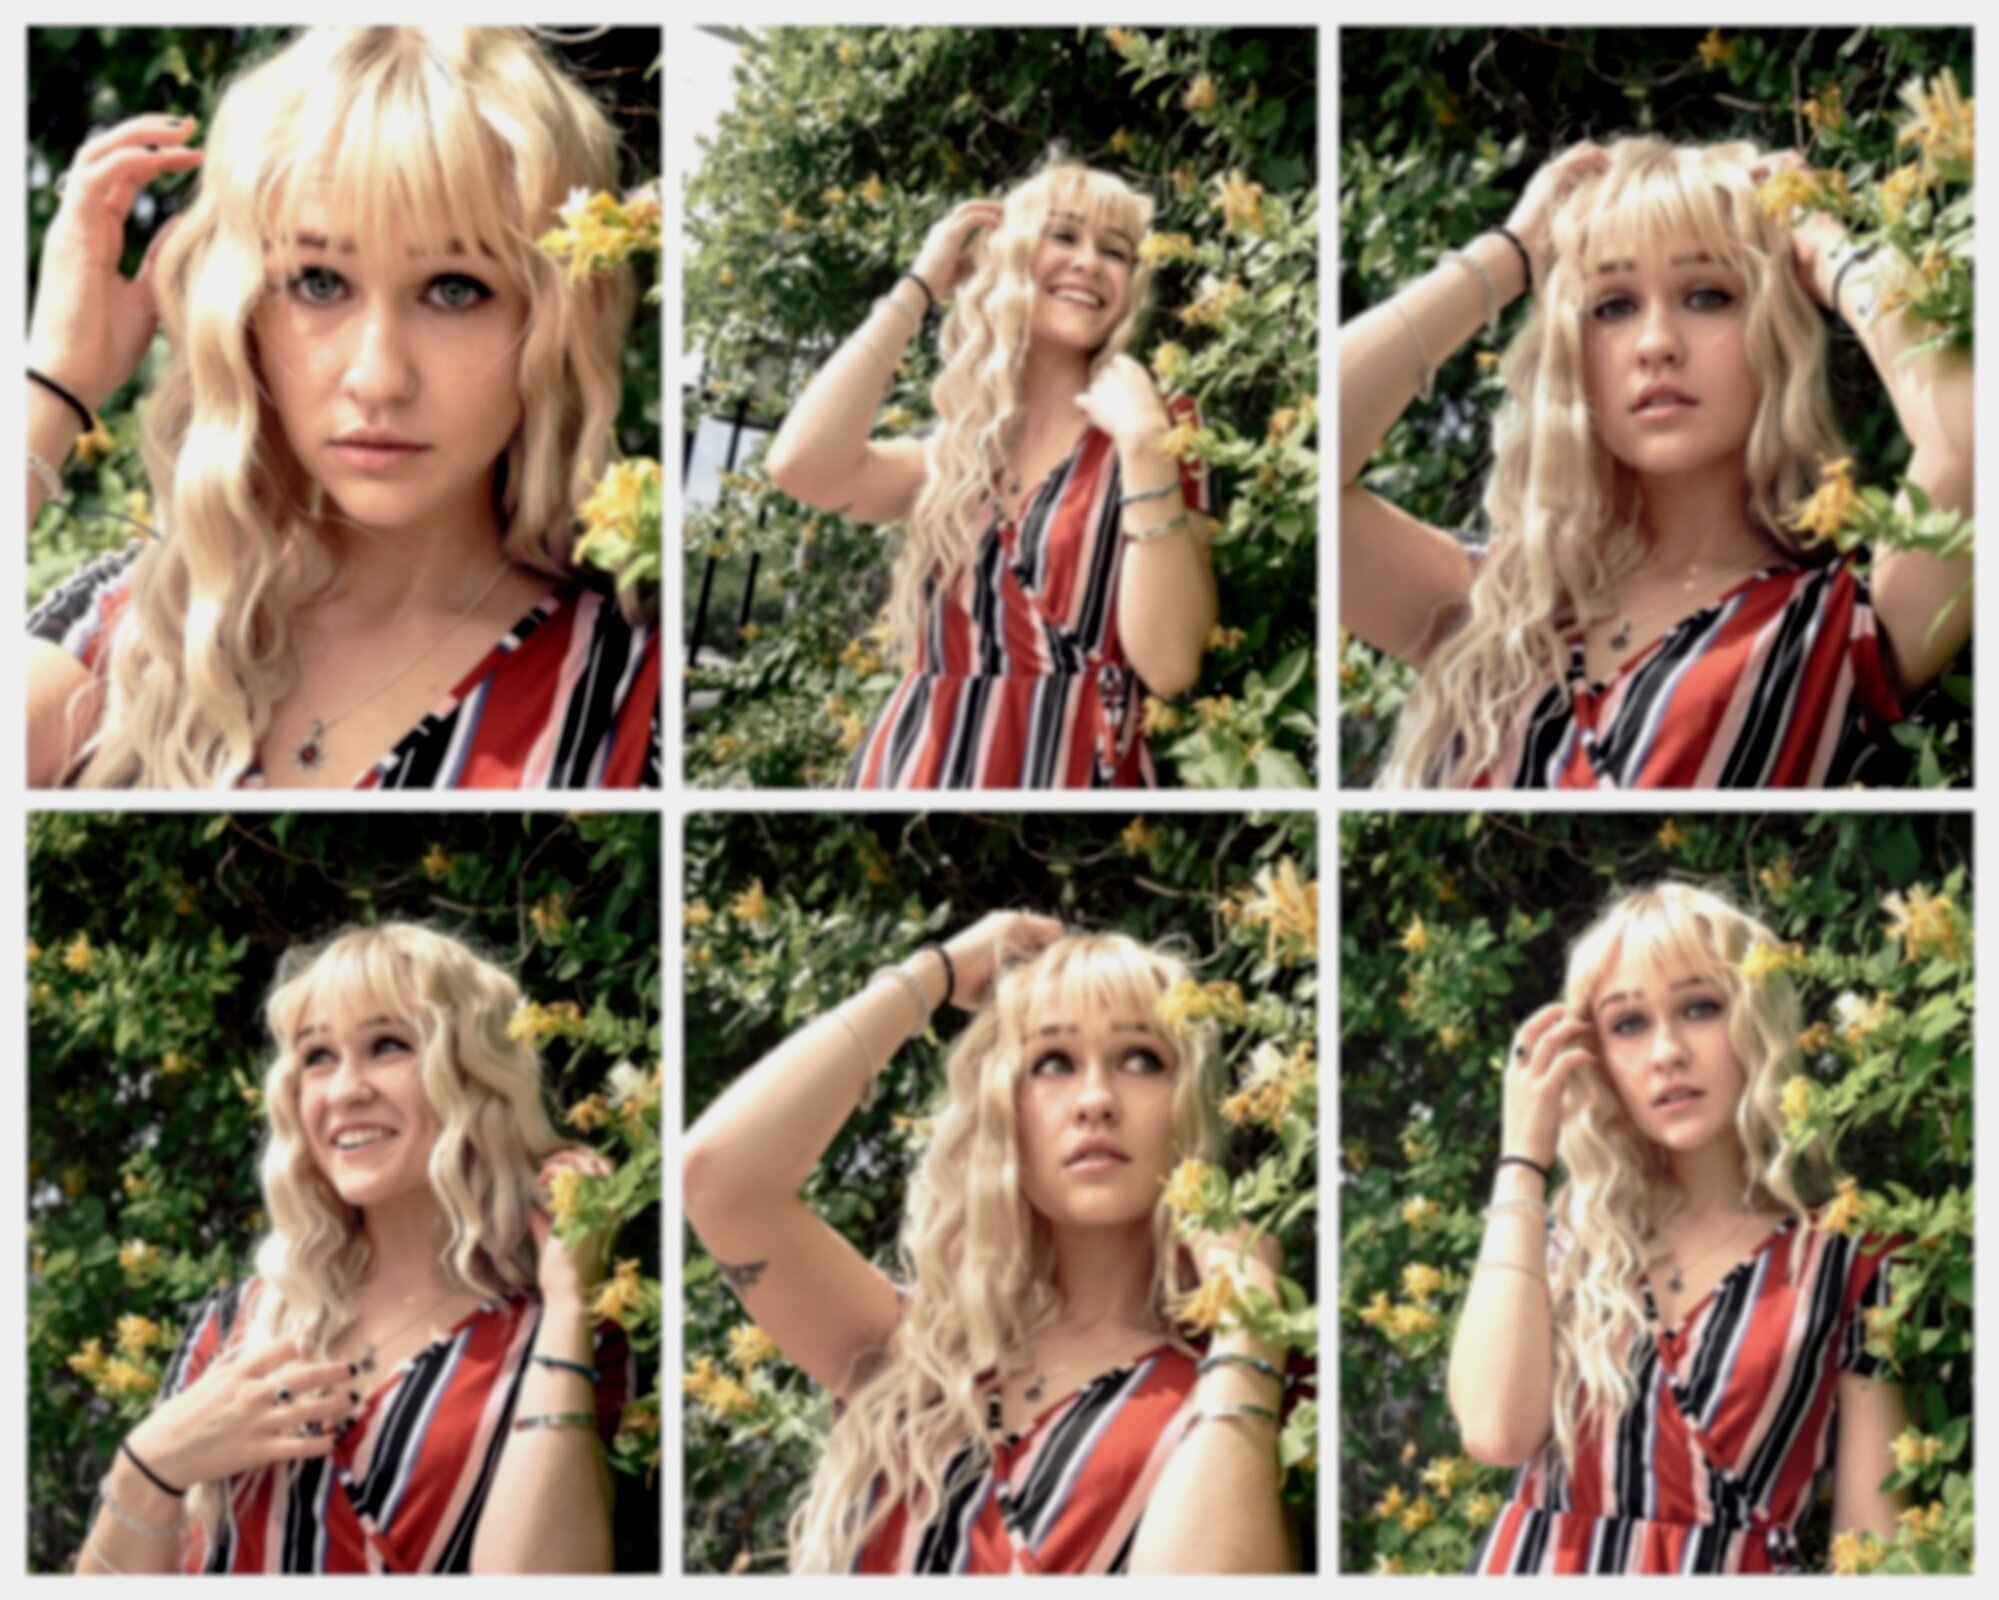
Once we both arrive on location and shuffle out of our cars; her and I get acquainted and walk into the outdoor display of various plants, flowers, and trees for sale. I decide to keep walking till I find a cute chair for her to sit in while I adjust my settings and test my exposure. I then decide to try and take advantage of the cute spot and get some images through the plant on the table next to her. As a photographer this is where you try to help your model or client relax, take some test shots and release the pressure. If you don’t end up keeping any of the first images that’s fine! You told them they were test shots anyway! Keeping taking to your client as you take the first images and get to know them!

Walking Around:
After getting my test shots and general exposure set in we move on from the chair and start to walk around. I personally have no specific method to this, I just walk around with my model or client until I see something interesting that I think might look nice for the images and suggest we try some stuff there. It’s a simple yet effective strategy.
The first thing we come across that I think may be worth exploring is a big gong set on the floor next to some potted trees. It’s a small space to work with but I actually really liked the result!

After a few shots at the gong we continue on our way across to nearly the opposite side of the store to some potted rose bushes on shorter display shelf. I had her sit next to the bushes on the shelving unite and clicking away. Again, it was a fairly small area to work with but after finding the right perspective this is how it came out:

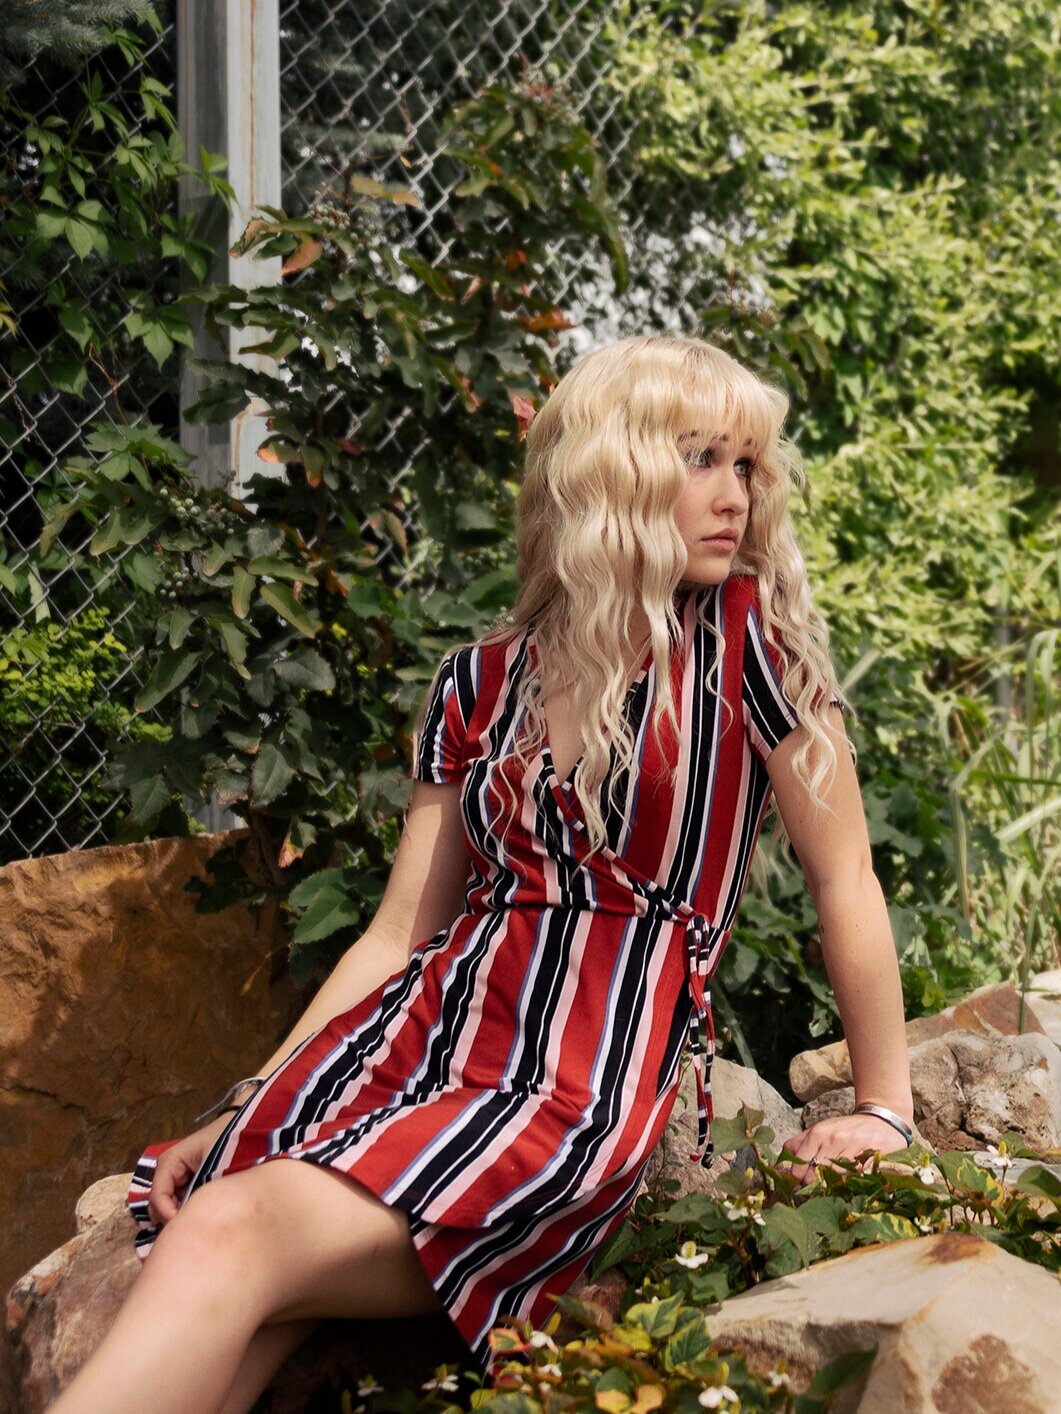
Just to the side of the shelving of roses, the store border ends with a great big wall of Trumpet Vines growing up the fence, Luckily for us the vines were in full bloom and absolutely gorgeous., so we obviously walk over to the wall of vines next. Here, I get some of my favorite shots from the whole shoot.

Continuing down the vine wall to the back of the store there is a small pond. I see a spot in the rock scape for my model to sit on and we get some images there, although the actual pond doesn’t make an appearance in the images. The angle in order to include the pond in the frame was a little awkward so I decided to just not include it at all and see what other kind of images I could get from the spot.
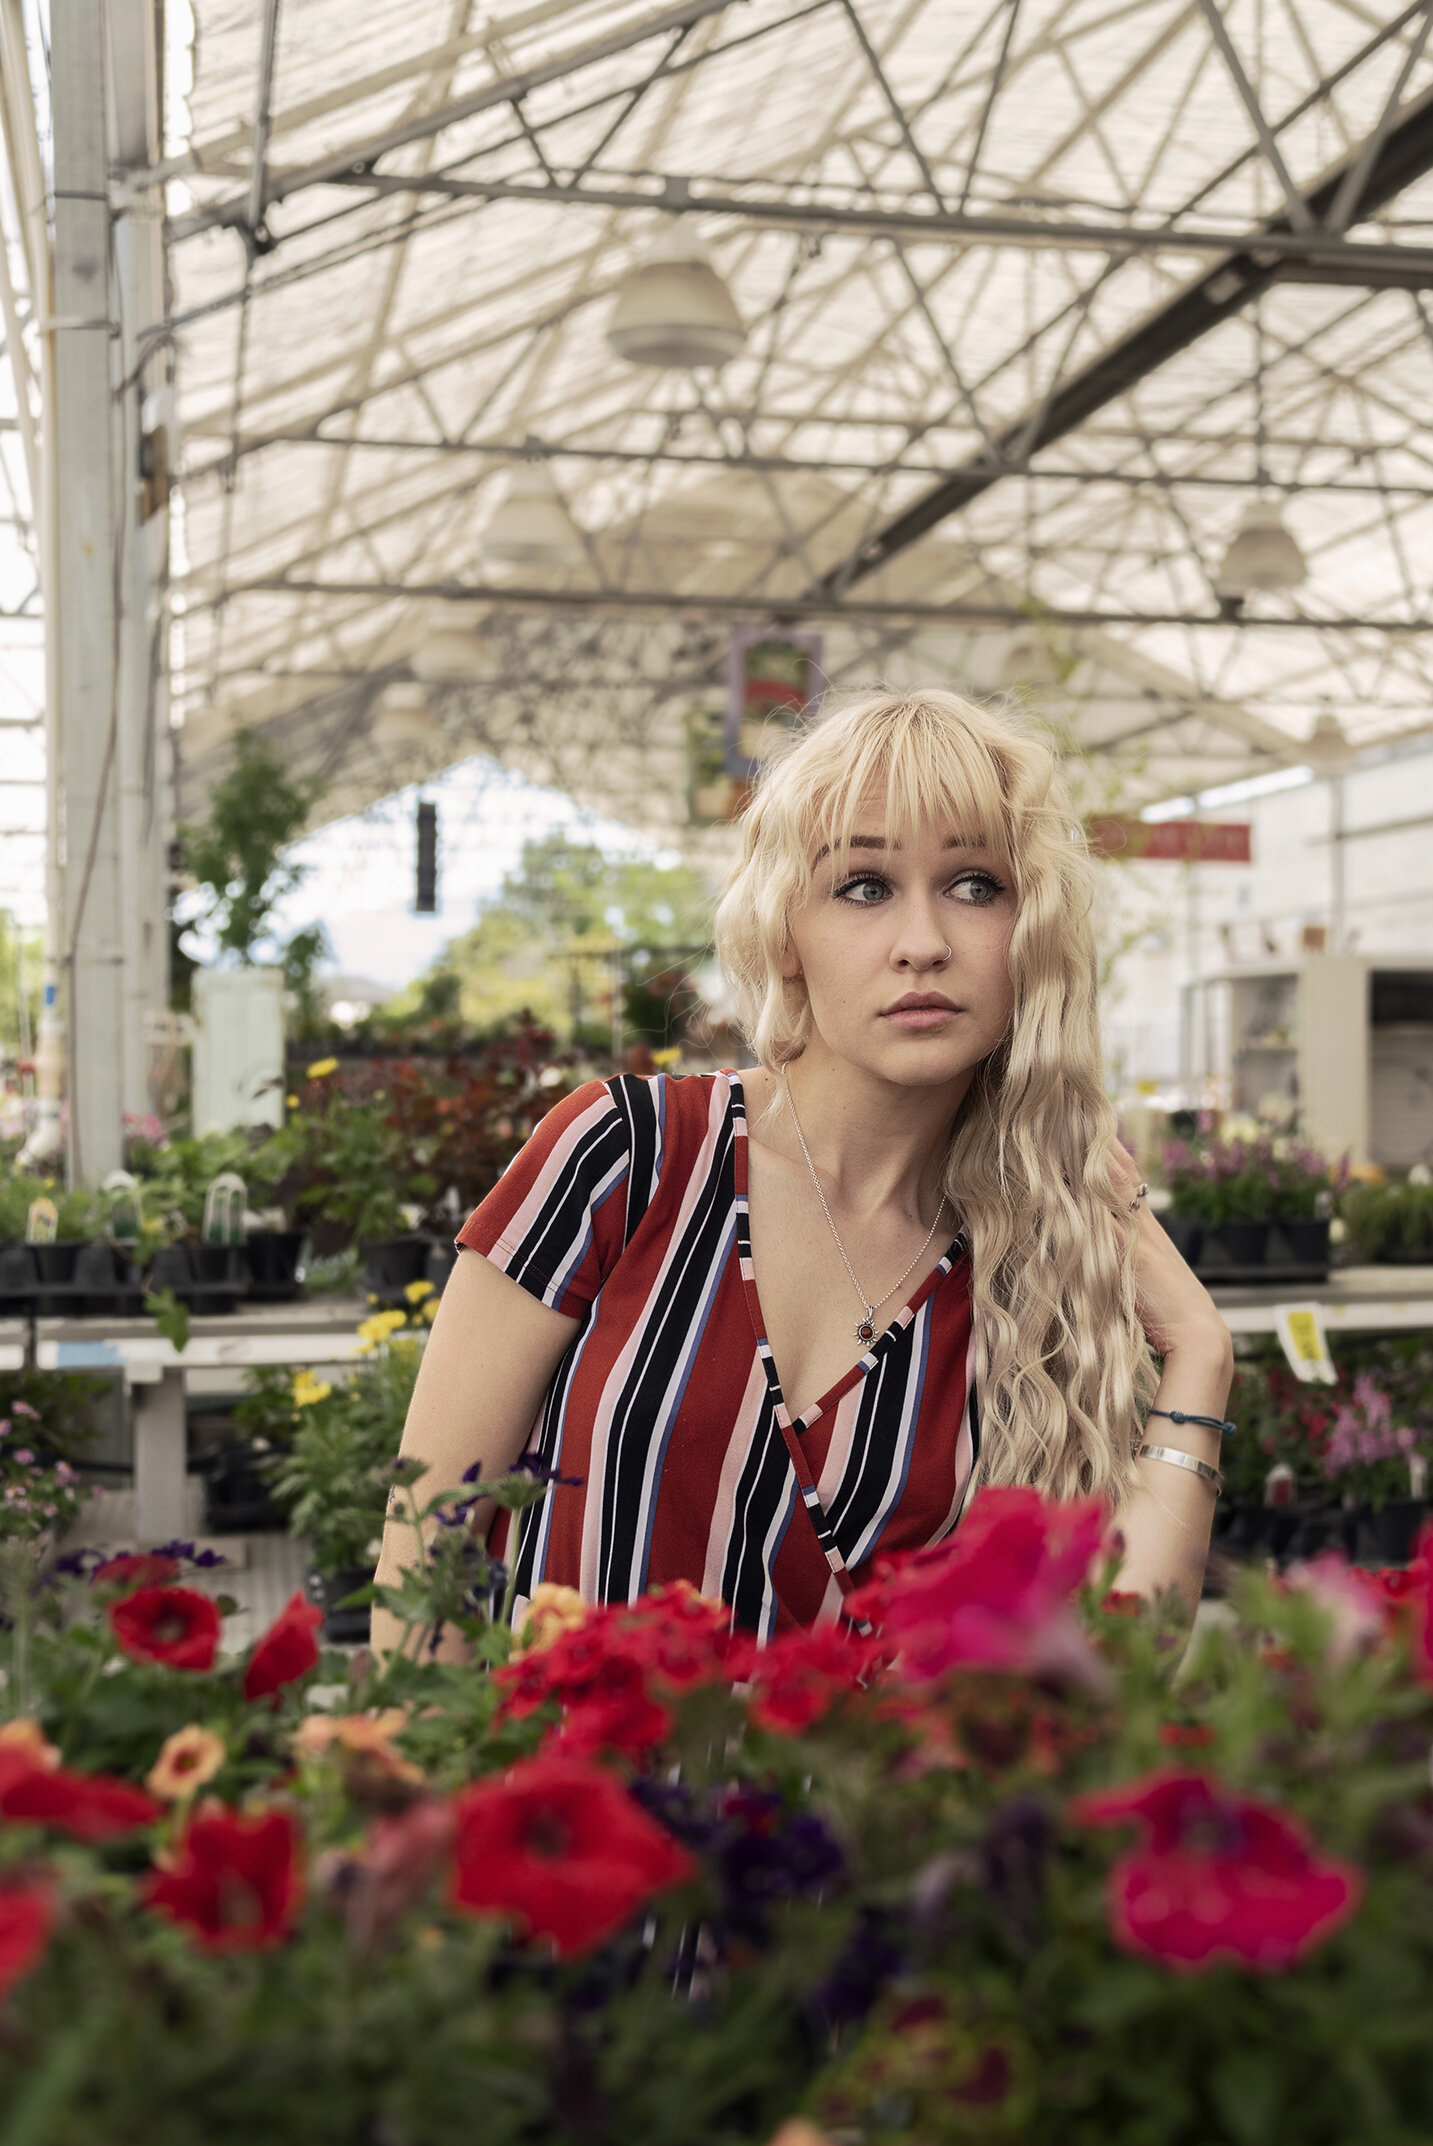
From the pond we decide to walk into the shelvings of plants. I really wanted to get a shot for the vibe of the whole location and I feel like we really accomplished that in the images here:

After getting the images in that walkway I remembered some cute nick-nacks and garden decor at the main entrance area and decided it had potential after walking over to them. Here I had the model tuck herself into one of the potted trees and got down low to take the shot. I thought those metal flowers were super cute and wanted to get them in the frame.

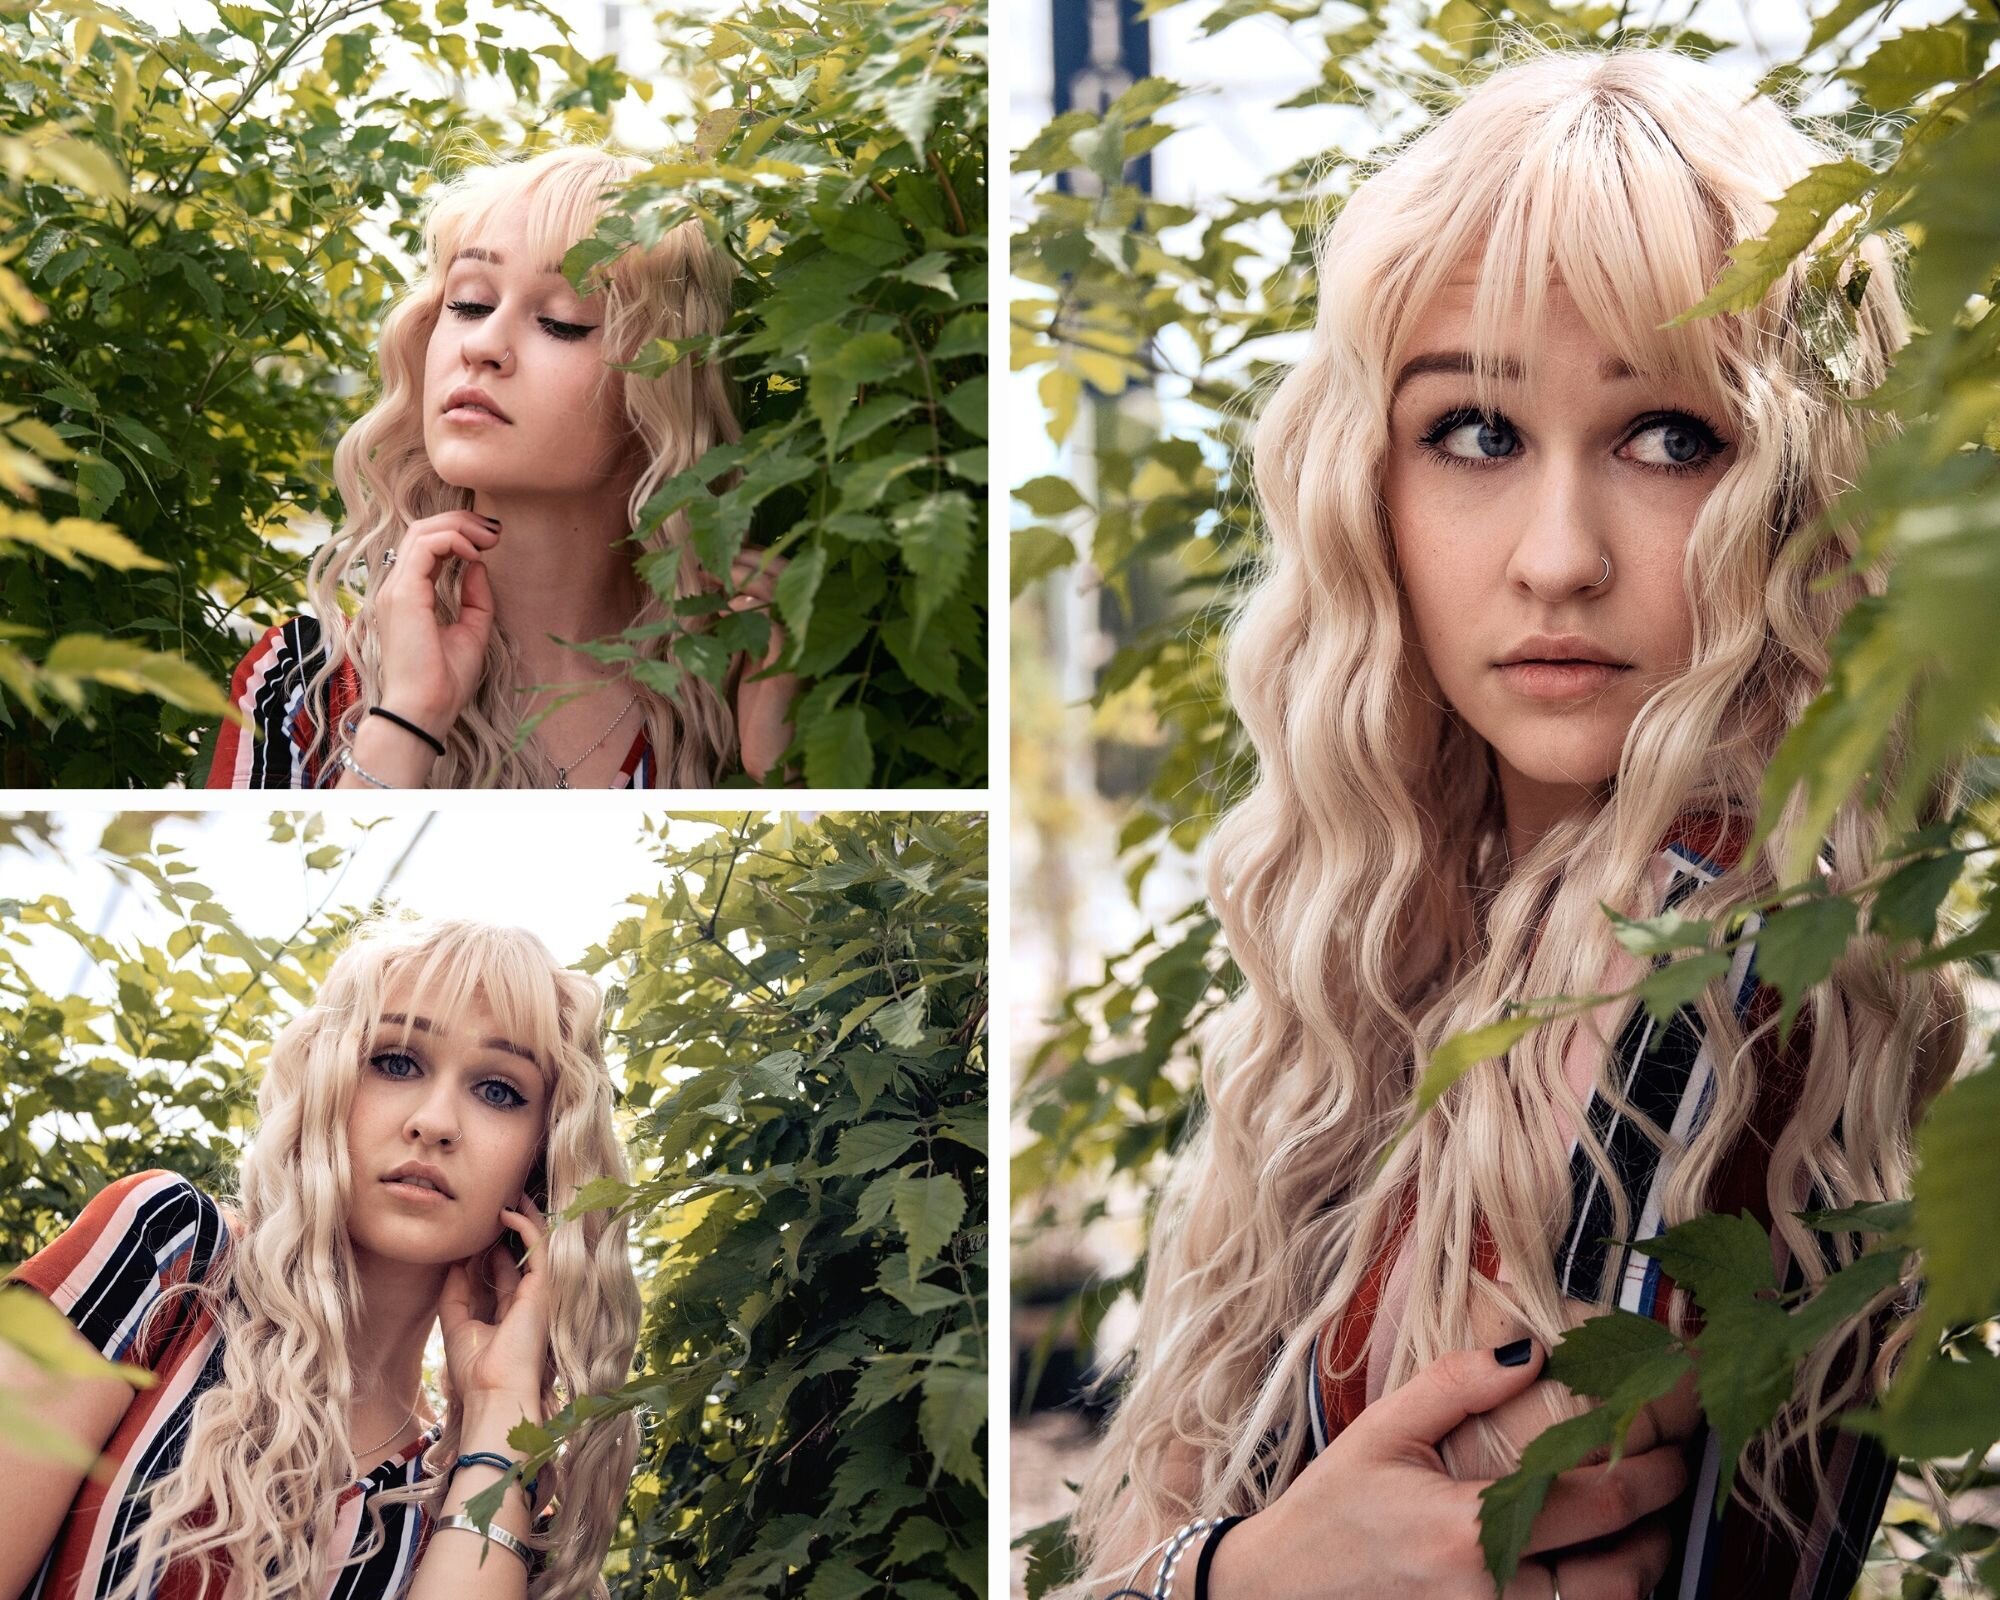
We continued to walk around from there and I had the idea to shoot through some of the flowers to again get an entire feel for the location we were shooting in.
Continuing our walk we happened upon a bench with some potted plants displayed on it. I move one plant to the ground to give the model a space to sit on and we got a couple of shots there.

Just to the side of the bench were rows of potted trees with a nice walkway in the middle. I first took some images there standing at level height with the model but then opted to lay on the floor on my back to get some more unique angles. I laid at the opposite end of the path and asked the model to walk toward me a couple of times, changing the camera orientation from portrait to landscape to get a variety of options.

After getting our images there we traveled to the outer side of all the plants where the ceiling disappears into an open area with more landscaping type materials. Just bordering where the ceiling ends there was another row of trees. I placed my model just on the edge of the shadow to get the reflected light from the concrete up on her without being in the harsh direct sunlight.
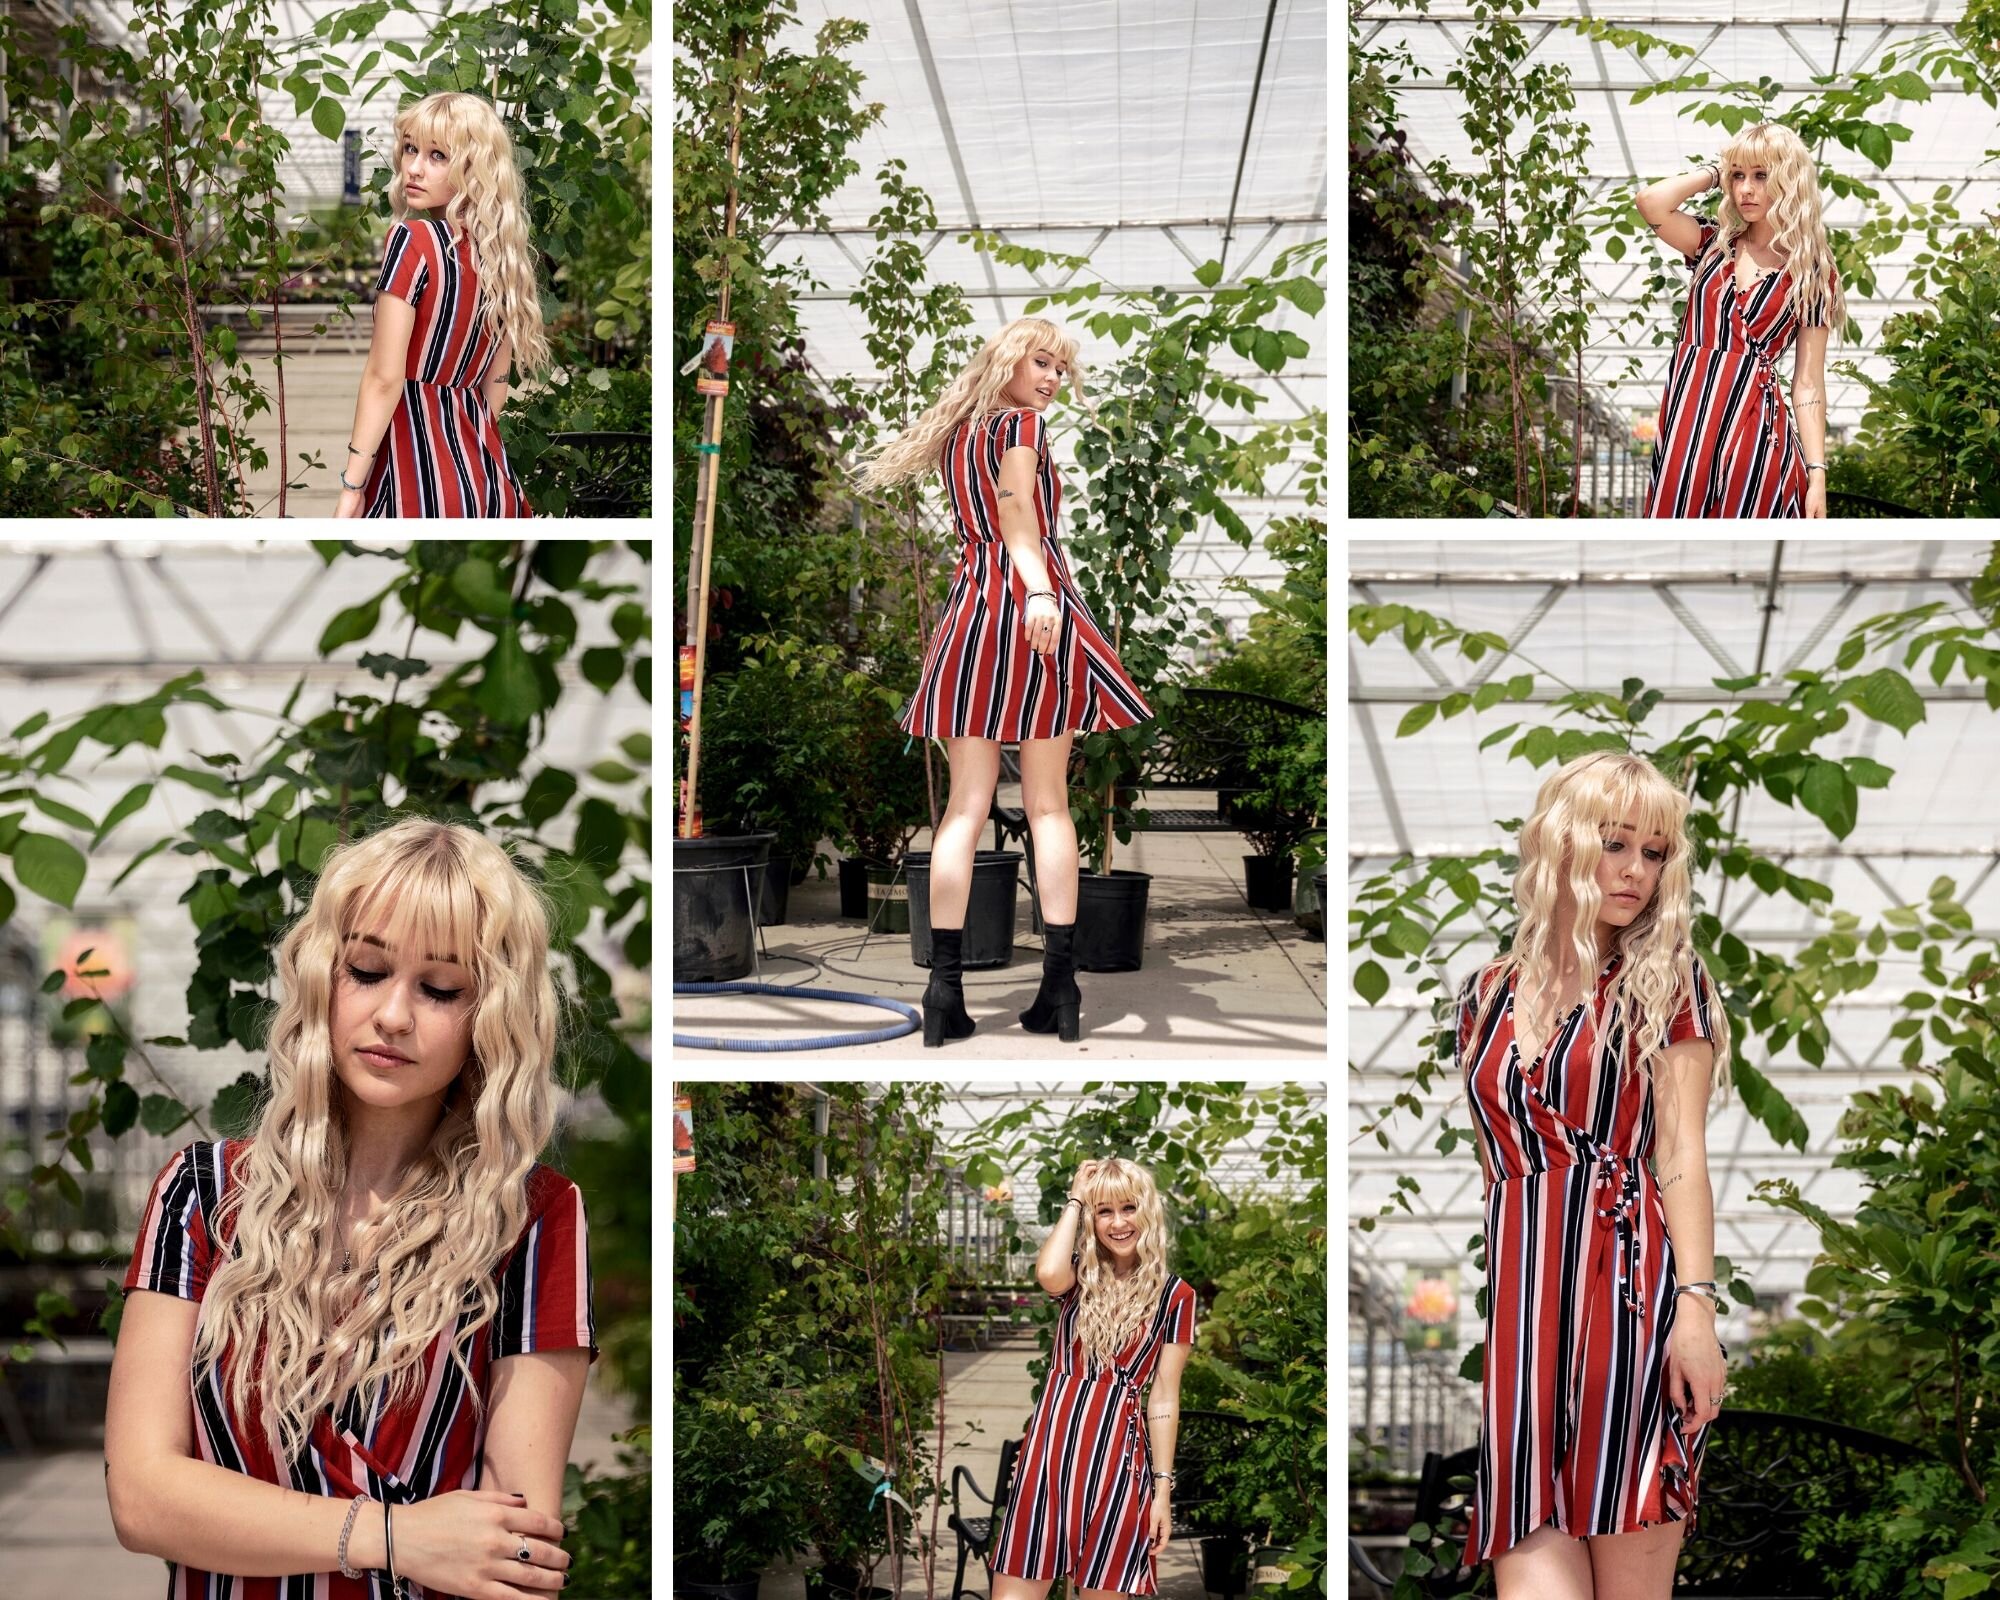
At this point I bet you’re thinking we’re really deep into the shoot but believe it or not we’re only roughly 20 minutes in! I had no specific time restraint that I was trying to fit into, but the next 3 spots we chose only took up only an additional 10 minutes making this entire shoot just 30 minutes long. The 3nd to last spot was just around the corner. Here there were a bunch of decorative pots stacked up with each other and after an internal debate on if it could work i decided to see if the model wanted to give it a try. On top of one of the large pots were wood pieces used to stack up other pots on top of it. I arranged the wood pieces to make a little spot for the model to sit on and pose. In the end I happy we both gave this spot a chance!

The 2nd to last spot we hit was the main center walking path through the plant display. I knew from the start that I wanted to get some images here so that’s where we went next.

I thought of being finished here but then I saw from the corner of my eye a spot with sets of potted vines growing up tall individual trellis. I suggested we go there next and I’m very happy we did!
Finishing Up The Shoot:
From that point I looked around the whole area one last time to see if there were any other spots worth trying out and I couldn’t see much. I felt really happy with all the images I had taken throughout the shoot. Once I decided I couldn’t see any more locations within the shop I made sure to ask my model if there were any places she saw and wanted to get photos at. She said no and that we covered all the places she could think of. So, after 30 minutes we decided to end the shoot and say goodbye from there.
Editing And Delivery
Editing:
From the moment the shoot ended I couldn’t wait to edit and deliver them to the model. When I first load the images onto my computer I do a “first purge.” I go through all the raw files and delete the ones that I definitely won’t be using. For example: blurry images, images with blinks, images with poor exposures, etc. Once I do the “first purge” I move onto my “second purge.” Here I pick out the very best images from the shoot. There are always a bunch of decent images that aren’t blurry and dont have blinks which don’t get thrown out in the first image purge but that doesn’t mean they’re all the very best images from the shoot either.
In my second image purge I look for subtleties in the images that put them above the rest of the decent images. Things like accidentally cropping the model at a joint or maybe the models eyes look slightly more open in this image compared to that image and so on. Once I go through and give the images that I think are the best ones a star rating I do basic edits on them in Adobe Camera Raw. I’ll usually reduce the contrast, bring the shadows up, the highlights down, and do my lens corrections.
After doing basic edits in Adobe Camera Raw I’ll Load my images into Photoshop and do more in depth color toning, tonal adjustments, and dodging and burning to lead the eye and bring out my subject.
Once I get the photos as I like them I export each image as 2 different sized JPEG files. One as a full resolution JPEG for printing and another JPEG file sized for web use. I do this because a lot of social sharing websites do not handle large files well. They compress the image to fit a specific size limit which usually leads to a pixelated representation. Personally, I want the images I take to look good everywhere they’re posted so I do the compression myself to ensure the quality.
Delivery:
After I export all the files I create an online gallery for my models/ clients to view and download their images through. I separate the high resolution files and the web size files into different collections within the gallery to be available for download.
Once the images for this shoot got loaded up for download I sent the link to the model and the rest is history!
Final Thoughts
Ultimately, I was super pleased with this entire shoot from start to finish. Although Western Garden Centers wasn’t the embodiment of the idea for a location that we started with, it proved to be a very cute and worthwhile photoshoot setting. I would highly recommend considering this location for your next photoshoot. Just remember to call ahead and be respectful of the environment and the people who work there!
Thank You For Reading!
I